
List Price: $41.00
Sale Price: $26.87
Today's Bonus: 34% Off

Finding the right switch was like a search for the Holy Grail. I installed 2 different switches in 2 different ways for each trying to make it work. Major issue was trying to figure out what switch to buy, so I will lay it out in a very simple "Electrical Connections for Dummies" kind of way.
Disclaimer: the wiring in your home may be different from mine, so please use this advice at your own risk.
My situation: Laundry room leading to the garage with doored entrance on both ends. 2 switches, one on each end of the laundry room.
My want: To have the laundry room light turn on automatically when I enter the laundry room from the garage or from the house and turn off automatically after a couple of minutes
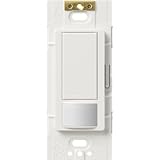
The solution: This switch and the below instructions
1. Turn off your power to the switches at the fuse box
2. Take off all the wires from both switches and separate them. My switch has 4 wires: 2 black (1-hot, 1-traveler), 1 red (traveler) and 1 bare wire (ground) Note: If you have white wires in there, then those should be your neutral wires and should already be tied off to another white neutral to complete the circuit (don't worry about these)
3. Buy a hot wire detector (like this one: http://www.amazon.com/Fluke-1AC-A1-II-Volt-Alert-Non-Contact-Voltage/dp/B000EJ332O/ref=sr_1_1?ie=UTF8&qid=1336776918&sr=8-1) from Amazon. I bought one at Home Depot for about $14.
4. Turn on power to the switches at the fuse box please make sure that nobody is going to come wandering in and touch the open wires
5. Take the hot wire detector and place it near every wire from both switches. Once you find the hot wire, then label it as "hot". This is the wire that is connected to your fuse box, and this is where you HAVE TO connect the regular switch. You CANNOT put the Motion switch on this end Update: Someone commented that you can, but just stating what the installation instructions showed in the diagram.
6. Turn off your power to the switches again at the fuse box
7. Take the "hot" wire and screw-tap with one of the travelers which you will label as "Traveler A"
8. Turn on your power to the switches at the fuse box
9. Use hot wire detector to find the live traveler wire on the other end (where the motion switch will go)
10. Label that live wire as "Traveler A"
11. Turn off your power to the switches at the fuse box
12. Repeat step 7-10 for the other traveler wire but label wires as "Traveler B"
13. The remaining wire at the Motion switch end is the "load" wire that connects to the laundry room light
14. From here you should be able to follow the instructions of the Motion light switch fairly easily. Only thing that may seem confusing is connecting the wires at the regular switch you have to take the separate wire included with the motion switch and connect that to the black screw of the regular switch and then screw-tap it with the "hot" wire and one of the traveler wires. After that, the motion switch connections are straightforward.
This switch allows you to do the following:
Adjust motion detection sensitivity (regular and extra-sensitive)
Adjust time to auto off (15 seconds, 1 minute, 5 minutes, 15 minutes and 30 minutes can't remember exact increments since I only wanted 1 minute).
Make it auto-on (what I needed) or manual-on switch with auto-off
Turn off the lights manually either at the regular switch end or on the motion switch end, and it will reset itself for auto-on (takes about 20 seconds to reset itself)
Able to use with CFL or better known as fluorescent bulbs which is what I have.
Great switch and fits my needs perfectly. I have found the Holy Grail.
Good Luck!
UPDATE 4/8/13: Well, it's been about a year since I installed this switch, and it is still working like a charm. Very sensitive motion detector which is what I wanted so it will instantly turn on upon entry from the house or from the garage. One of the better home improvement projects that I have done. The other ones are timer switches on my bathroom exhaust fans. It's these little things that make your house a home. I am glad this review helped some people out there since it aggravated me to no end spending many hours trying to get the right switch to work. Will keep the light on for you.....or not.
Click Here For Most Helpful Customer Reviews >>
Customer review from the Amazon Vine Program We have a laundry room that is like a tunnel, washer, dryer and a deep sink on one side, the rest of the area is used as a hallway to the garage. There is no skylight or window in this room, just a light fixture on the ceiling with switches near the doors at either end. When my sweet wife does laundry, she usually has her arms full of clothes headed for the washer---she has tried turning the switch on with her elbow, and usually not much luck, set down the laundry go back and turn the lights on and then load the washer, hoping to avoid dog toys etc. on the floor. (I know this sounds pathetic, but it's just the way it is).I installed this switch a few days ago, replacing the manual switch by the door. Now enter the room and kazam, the lights are on, no fuss no muss. It really serves a purpose in a situation like ours! I was unaware that a product like this is available, so glad it is.
If you decide to purchase one of these I would recommend reading the instructions first. I didn't, and had to go back as I was a little confused as to what wires went where. It is a rather simple job and does not require much skill. Anyway, back to the switch. There are several adjustments that control the length of time the lights stay on after you leave the room--1, 5, 15, or thirty minutes, the sensitivity of the switch, daylight sensing and a vacancy mode. You have a lot of flexibility to adjust for room size, a problem with pets wondering around turning the lights on etc. I just can't think of one negative to write about, except my failure to read the instructions first.
Entering the room from either end activates the light, staying in the room keeps the lights on, after leaving, lights go out in one minute. Am thinking now of other rooms where this would be useful as we are so pleased with its functionality.
Hope this is a bit of help and explains more that the description.
Ed
Best Deals for Lutron MS-OPS5M-WH Maestro 600 Watt Single Pole/3-Way Occupancy
*** WARNINGS ***I AM NOT AN ELECTRICIAN, and I have only minimal DIY experience. We had the need, so I figured out that this could be done from the internet (really). So, don't be intimidated by my lengthy instructions; I just wanted to be thorough so that no one else would have to spend the hours figuring this out that I did. If I could do it, then you probably can, too.
While the instructions that come with the motion sensor switch don't say either way as to whether the switches at both ends of a 3-way installation can BOTH be replaced, the Lutron Maestro Switch with Occupancy/Vacancy Sensor catalog states that "Only one Occupancy sensing switch can be used per multi-location circuit." I suppose that that statement could be read as the listing of a shortcoming, not as a prohibition. However, I don't think that Lutron intends for you to use their sensor switch on both ends of a 3-way installation. Their instructions recommend the MA-AS for multi-location installations, but the MA-AS is not a motion sensor switch. Regardless, it IS possible to use a pair of Lutron MS-OPS5M switches in a 3-way installation by following the instructions below.
*** END WARNINGS ***
-Instructions --
The instructions linked here for using a pair of motion sensor switches are actually for the Leviton PR180 but they work for the Lutron MS-OPS5M (if the links get removed, then do a Google search for "leviton pr180 both switches", click on the SmartHome link, and look for Alex's review with the PDF link).
As you read the instructions, you'll note that you DEFINITELY need a voltage tester. They're cheap. The following kit has two types of voltage testers:
Greenlee TK-30 Basic Electrical Kit
Or, you can get the multimeter by itself:
Greenlee AM-6 Analog Multimeter
Just make sure that it's set to alternating current (A/C) for a value greater than 120V, if you're in the United States.
You'll notice that the Leviton PR180 comes with different colored wires than the Lutron MS-OPS5M. Following is my logic for assigning the wires the new colors. It'll help if you print out the instructions, then write these corrections on them.
My two Lutron MS-OPS5M's came with two black wires, a blue wire, and a green wire. If you look through the holes in the back of the switch, you'll notice that where the top black wire is connected to the circuit board, it says "Black". The lower black wire is labeled "Black-Red" on the circuit board.
1. Using the circuit board labeling as my guide, I crossed out "Black / Noir / Negro" on the instructions and wrote "Top black" for BOTH motion sensor illustrations.
2. Then I crossed out "Red / Rouge / Rojo" for BOTH motion sensors and wrote "Lower black".
3. I crossed out "Yellow/Red" and wrote "Blue" (so the blue wire on each Lutron MS-OPS5M will be capped off, and not connected to any house wires). You may want to circle "NOT ATTACHED" to extra remind yourself not to attach the blue wires to anything.
4. At the top left of the top motion sensor illustration, I put curly braces ({) next to "Wire Load Hot" and "WIRE B", and wrote "BOTH!" For some reason, it took me a while to figure out that both "Wire Load Hot" and "Wire B" would be attached to the top black wire of the Lutron MS-OPS5M (meaning that three wires will be joined together).
5. At the top right of the bottom motion sensor illustration, I put curly braces (}) next to the "LINE HOT" and "WIRE A", and wrote "BOTH!" for the same reason.
6. You may want to also add "AND bare wire" next to both "Green Ground" wires since the Lutron MS-OPS5M requires you to attach both the green ground wire, and the bare wire to your grounding wire(s) (meaning that at least three wires will be connected together, depending on how many grounding wires you already have in your switch box).
That's it!
-----
So the reason that we need motion sensors on both sides of our 3-way installation is that it's a basement staircase with a 90-degree turn in the middle. A motion sensor at either the bottom or top of the staircase can't see the other end. Both the Lutron MS-OPS5M and Leviton PR180 come with instructions that only show you how to replace one switch. You're supposed to leave in one of the standard switches. Fortunately, after searching around for a while, I found Alex's post at which links to the PDF with Leviton instructions (if the links get removed, then do a Google search for "leviton pr180 both switches", click on the SmartHome link, and look for Alex's review with the PDF link). We couldn't go with the Leviton switches, because we have CFLs and the Leviton PR180 doesn't work with them.
Our Lutron MS-OPS5M switches have been installed at the top and bottom of the staircase for four days now, and so far so good! We love having the motion sensor switches at both ends! Our only qualm is that since it's a staircase, one minute is a tad long to leave on the lights. Fifteen or thirty seconds would be a nice option, but not necessary. If the occupancy sensor switches burn out or something else bad, then I'll let you guys know, but it looks like it was a success. We're so happy that we're probably going to get some more Lutron MS-OPS5M sensor switches to install in other parts of the house!
Honest reviews on Lutron MS-OPS5M-WH Maestro 600 Watt Single Pole/3-Way Occupancy
Update: Aug 1st 2013: Added caveat to clarify what will NOT work, formatted for easy read and to think why this has so few votes :-). Does not matter as long as this helps anyone and thats the reason we write review(s) and share information.Journey/Failures:
I had been unsuccessfully playing with Leviton's ODS-10-id to create a multi-location sensor, example across the staircase, while Leviton set-up works but due to unknown reasons to me or to Leviton's Support, sensors switch on lights even in bright day, really bright. So I had been looking for an alternate solution.
Solution with Caveat:
Lutron does not publish or even their support declines the multi-location occupancy sensor. I did post a picture for wiring diagram as "to be tested" but I can confirm now as "it DOES WORK". Caveat is that both the switches need to timeout or manually shut off to switch off the light/load. Other than that it automates everything for you, I never had a need to switch off lights manually so far in past 1 year+.
HOW TO:
Again, please do refer to my diagram as well. So for wiring for a 3-way, as you already know, there are two sides. One side uses the line/hot known as HOT SIDE and other one has the wire that goes to load known as LEG/LOAD SIDE. Both sides are connected to each other via TWO Traveler wires.
How to find HOT: Switch off breaker, open box, disconnect all wires from existing switch, Switch on breaker, check line/power, mark hot wire, switch off and proceed with sensor connectivity
HOT SIDE (refer diagram)
========
Line/HOT Black (top) of Sensor + Traveler Wire A
Traveler B Black (bottom)
Bare Copper Ground Bare silver + Green
LEG SIDE
========
Traveler A Black (top) of Sensor
Traveler B Black (Bottom) + Load
Bare Copper Ground Bare silver + Green
Blue Not connected in both sides
DISCLAIMER: Did work for me and may/may_not work for you depending on wiring etc. I am just an engineer and a homeowner with passion for automation and absolutely not an Electrician. When in doubt "please" call a LICENSED authority known as Electrician.
Happy to answer any questions as always. The picture I posted, with colored wires, to ensure clarity although resolution is not so great after Amazon conversion. For high resolution leave an email address and will send you link from my personal cloud for clear printable pdf file.
Find helpful customer reviews and review ratings for Lutron MS-OPS5M-WH Maestro 600 Watt Single Pole/3-Way Occupancy
Customer review from the Amazon Vine Program This is a very versatile switch. It installs very easily. It can be used as auto on/off; auto on/ manual off; manual on / auto off; or manual on/manual off. Even when set to auto, pushing the switch button turns the lights on or off. The sensor has a variable timer (that is easily set) and a variable sensitivity. Most amazingly, it also has a light sensor (when in some auto modes) that learns your light preference by seeing how much light is in the room when you override it.Finally, I found that this really seems to have a true 180 degree motion sensing view. I put this in my home office and I dont have the lights going off on me when I am sitting at the desk somewhat motionless. It seems to sense even the smallest movements unlike my old switch that was constantly turning off the lights on me.
The other switch I am comparing it to in this review is the Leviton PR180-1LW Decora 500W Incandescent, 400VA, Passive Infrared Wall Switch Occupancy Sensor, Single Pole and 3-Way, White

1 comments:
Thank you sooooo much for the review and wiring instructions! I spent hours trying to get my sensors to work before finding this post. My sensors are installed at the top and bottom of my stairs to the garage and work like a charm!
Post a Comment